AUDIO AND VIDEO
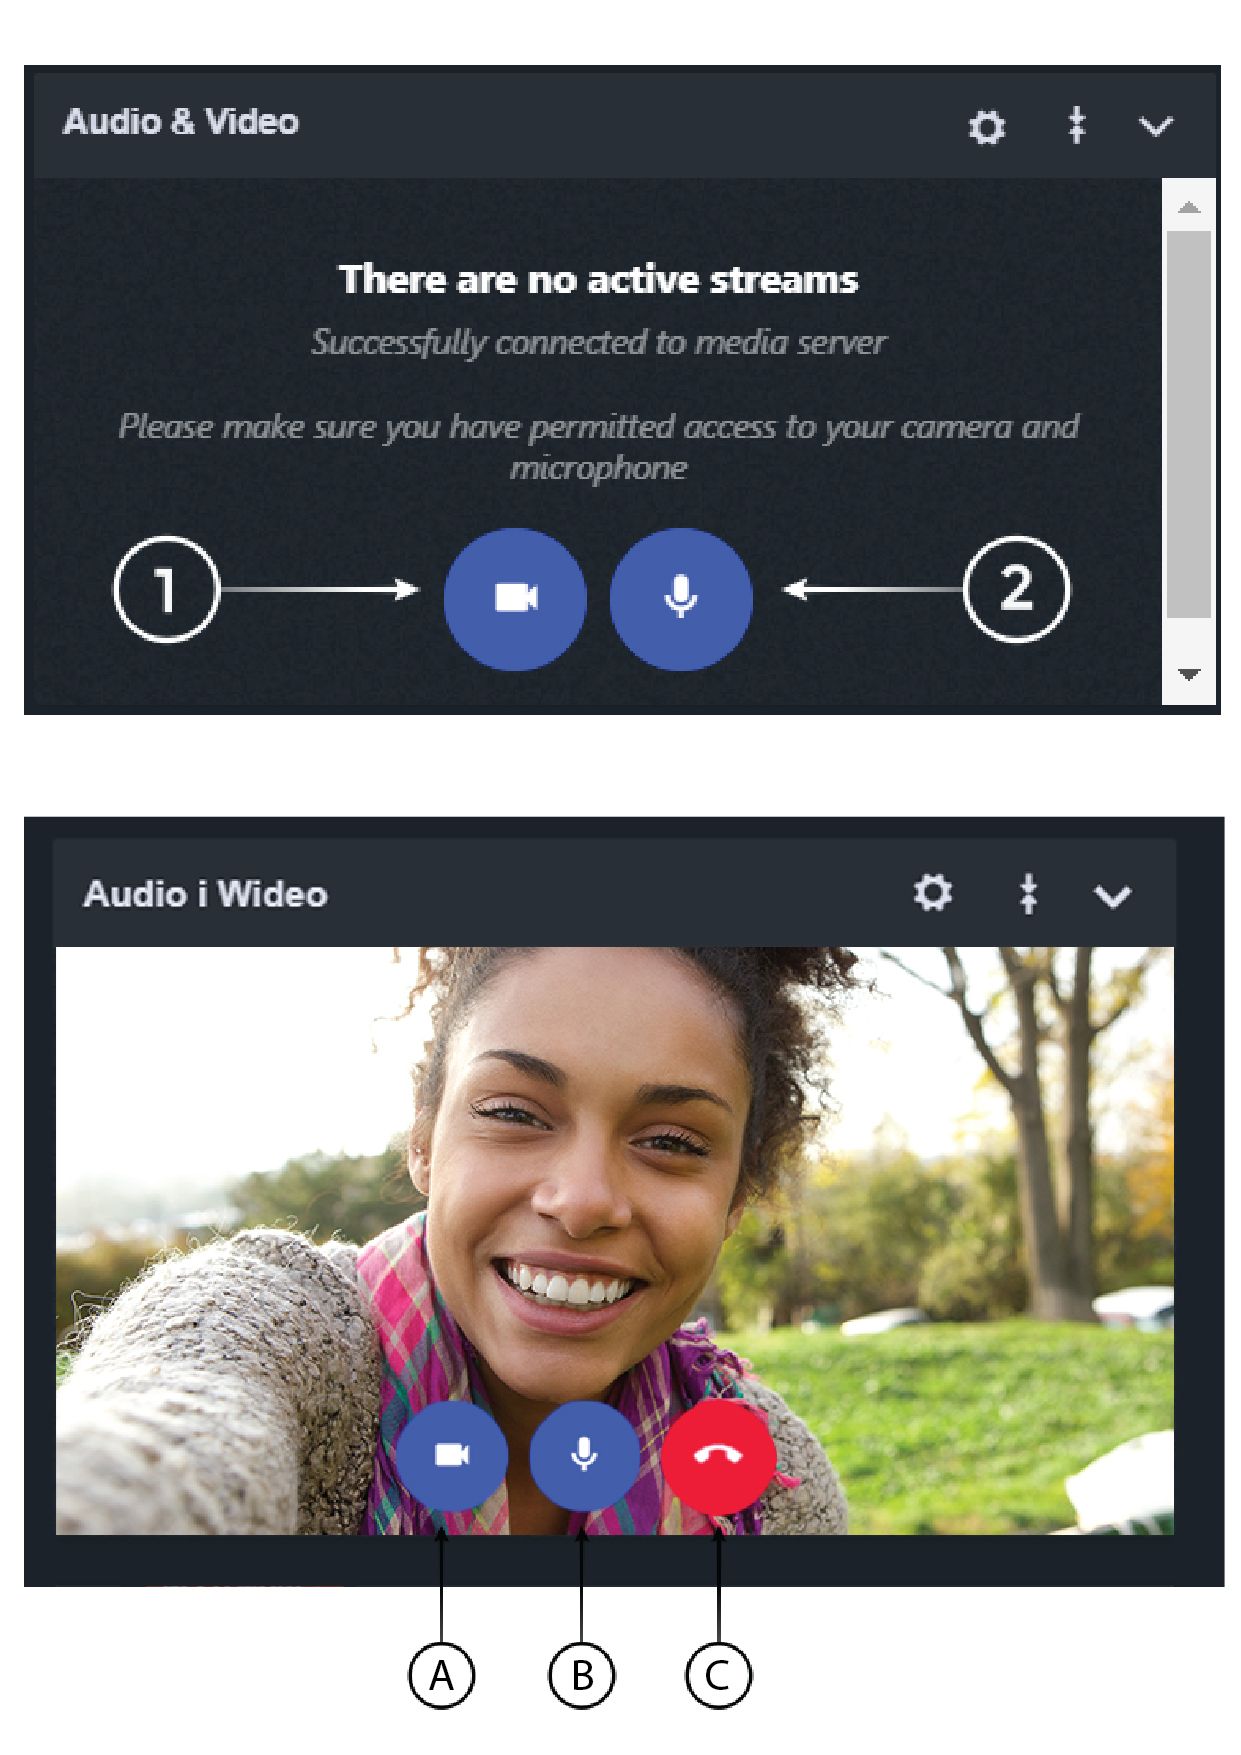
Starting Audio and Video
1. Start Audio and Video – after joining a room, you should enable Audio and Video in order to start broadcasting (see Error! Reference source not found.).
2. Start audio – starts only Audio mode.
Audio and Video broadcasting
A. Stop Video – pressing this button will stop the video broadcasting only
B. Stop Audio – stops only microphone (you can also mute microphone by double clicking)
C. Stop Audio and Video – switches off both audio and video
Audio and Video menu and settings
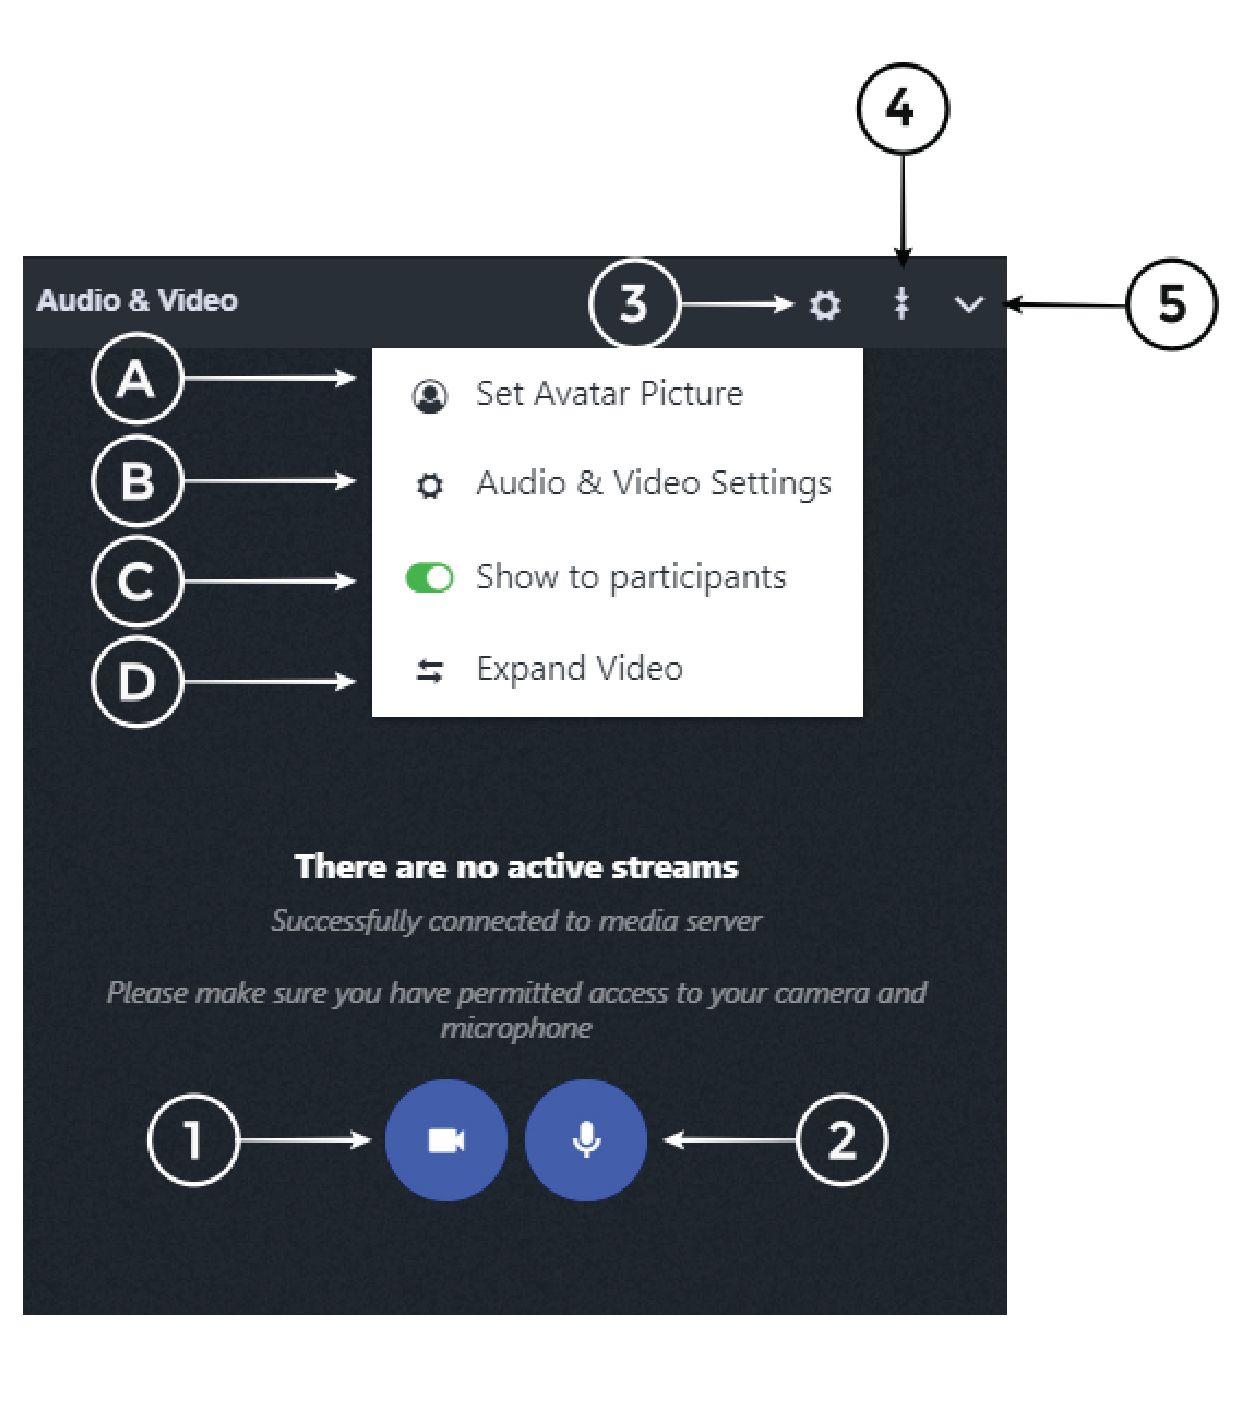
1. Start Audio and Video
2. Start Audio
3. Settings
- Set Avatar picture - allows you to place a picture from your PC, which will be shown instead of the video. You simply need to choose it.
- Audio and Video settings - gives you options for setting the camera and the microphone (see additional explanations)
- Hide from participants – allows to hide the chat from the participants
- Expand Video
4. Expand/ collapse Video – makes the Video window smaller or bigger
5. Hides the A/V window
Additional explanations
Please note that the shown options for Audio and Video settings are different, depending on the configuration that you are using. If during the session you connect a different device (camera or microphone), you have to go again
to the “Settings” and choose from the options which you will be given there.