USING THE RECORDER
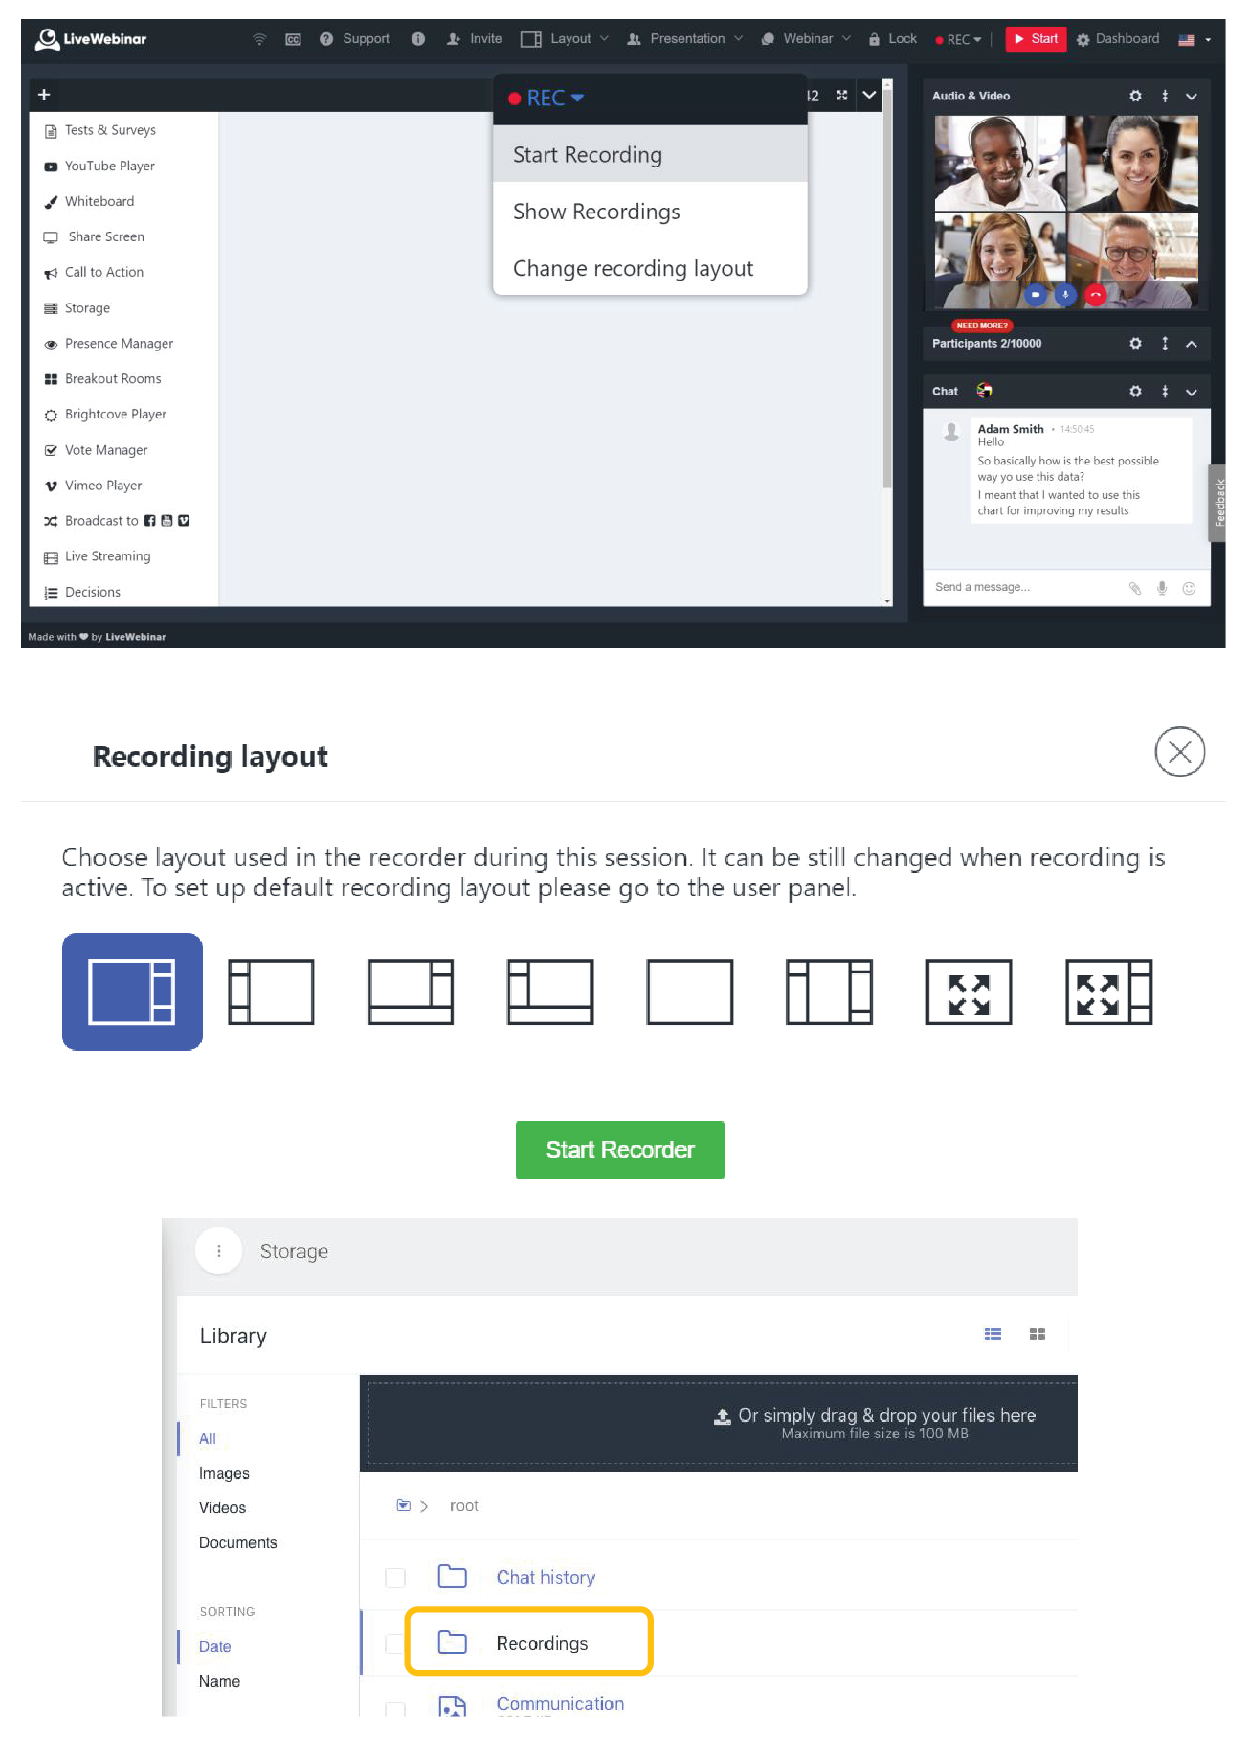
How to record your webinar
To begin recording your webinar, please click on the icon of “REC” to start recording. Be sure not to confuse this with the “Start” button which simply starts the session.
After clicking on the “REC” button you can choose between:
- Start Recording – start or stop recording during a session
- Show Recordings – go to the storage to find recordings
- Change recording layout – change layout anytime during a session (8 layouts available).
Recording Layout
It is possible to select the layout to be used in the recorder during a session by clicking on the “REC” option.
The layout of your recording allows you to select the way your room is
configured during your recording, i.e. you can choose where the chat feature will be or where the participant list will be displayed.
You can also select a layout that will present the sharing portion of the screen
in full size.
It can be still changed when recording is active, and this modification will be visible in a final video. For creating Evergreen recordings, we recommend using the last two layouts selected on the
picture below.
Auto START/STOP on recording session
In accounts having enterprise plans it is possible to set up an auto start/stop for recording your webinar. This means that by clicking the “Start” button in the right
upper corner, it will both start the webinar session and the recorder. Additionally, a session can be started/finished at a defined time and can be also extended when the duration of the recording is coming to an end by
clicking “Extend” in the pop-up window.
How to access your recordings
The space for recordings is a separate part of the storage area. To access your recordings, click “Storage” in the main menu, and from there click on “Recordings”. Storage spaces
for recordings (measured in hours) and storage space for other files (measured in megabytes) are independent of each other. The amount of recording storage you have depends on the package you’re working with.